
Diving into gem setting as a beginner can feel pretty daunting, especially when you’re staring at rows of specialized tools. But here’s the thing: picking the right kit right from the start changes everything. It saves you cash, cuts down on frustration, and sets you up for real progress. Go with the wrong ones, though, and you might end up with wasted time, cracked gems, or just plain discouragement.
This guide will walk you through the essential gem setting tools every beginner should own, how to choose wisely, and how to avoid common mistakes.
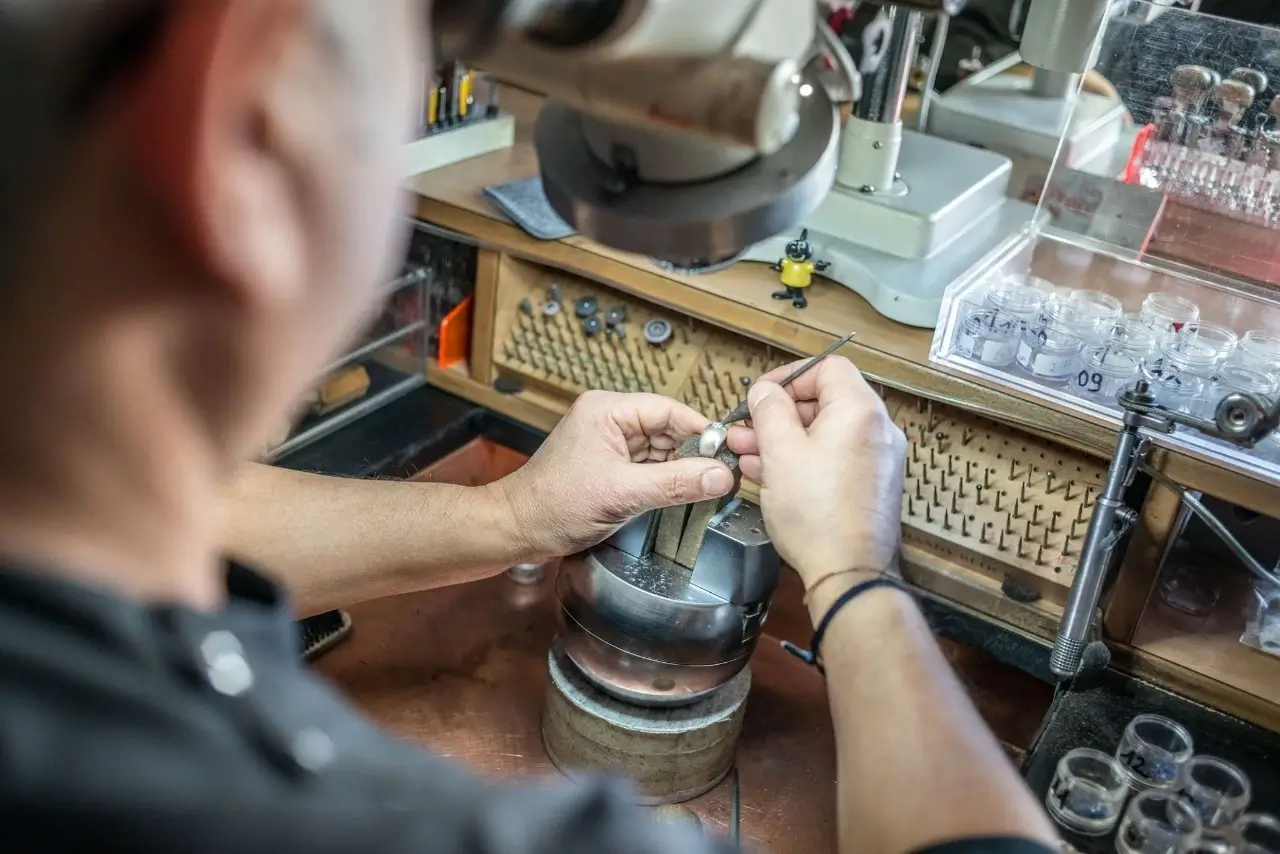
What Tools Do You Need for Basic Setting?
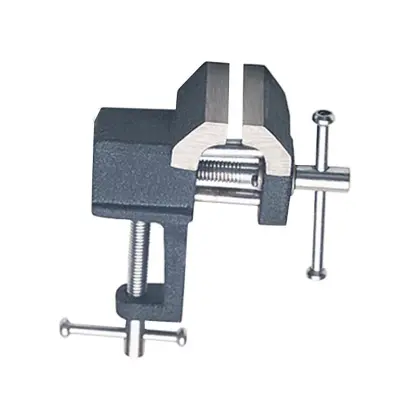
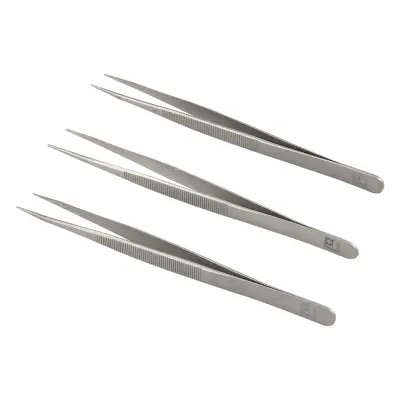
Fixed Tools
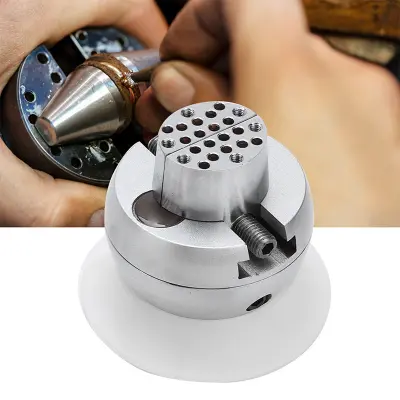
- Setting Blocks: These hold your jewelry steady while you work, giving you the stability and precision you need.
- Vise: It locks your piece in place for filing or hammering, helping prevent slips and damage.
- Tweezers: Perfect for picking up those tiny gemstones without leaving scratches.
Processing Tools
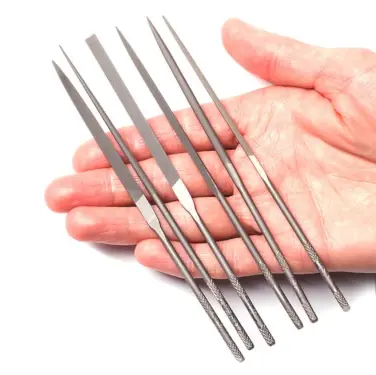
- Needle Files: Great for fine-tuning settings, smoothing edges, and tweaking prongs.
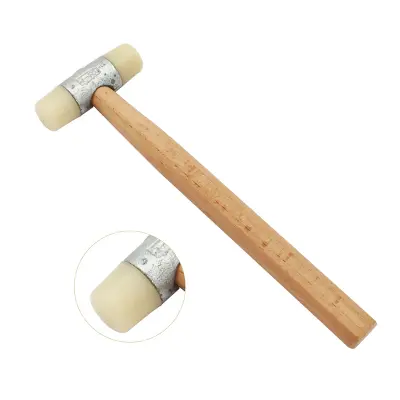
- Jewelry Hammers: Opt for lightweight ones to gently tap prongs into position without overdoing it.
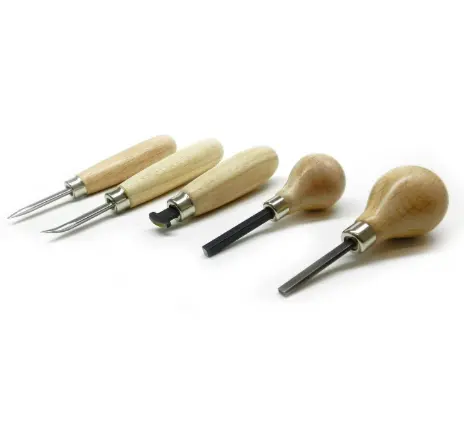
- Pushers (Bezel or Prong Pushers): These are key for snugly securing stones in their spots.
Auxiliary Tools
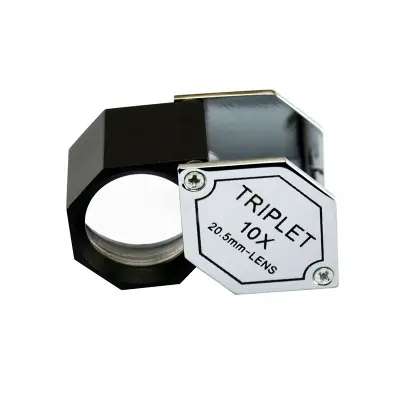
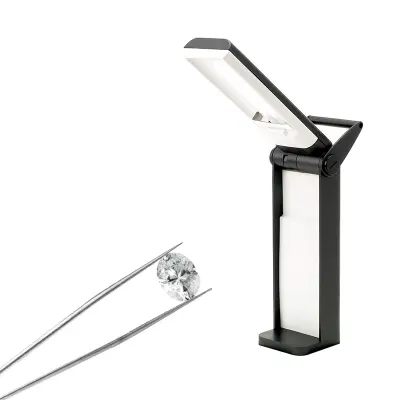
- Loupe (10x magnification): Lets you zoom in to check gemstone alignment and setting details up close.
- Work Light: Solid lighting cuts back on errors and keeps your eyes from tiring out.
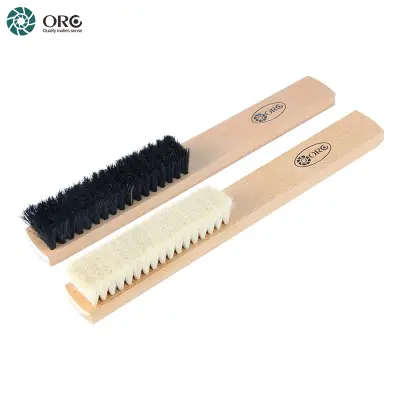
- Cleaning Brush: Clears away dust and bits so you can actually see what you’re doing.
Power Tools (Optional for Beginners)
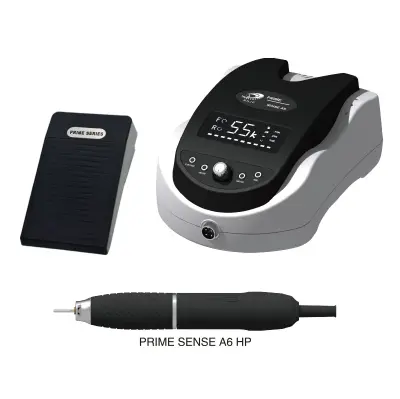
- Jewelry Micromotor: You don’t need this right away, but once you’re comfortable, it speeds up polishing, drilling, and engraving.
All these tools have a clear role and won’t overwhelm a beginner, letting you focus on mastering the basics.
How to Choose Your First Tool Set
Quality vs. Price
Strike a balance between tools that last and ones that don’t break the bank. Super-cheap options might snap or nick your gems, but you don’t need top-shelf pro gear just yet.
Buying Individually vs. Starter Sets
- Individually: This way works if you prefer building your kit slowly and prioritizing quality.
- Starter Sets: They’re handy and easier on the wallet, ideal when you’re just figuring things out.
Recommended Starter Sets
If money’s tight, kick off with tweezers, a loupe, a small hammer, and a pusher. Then grab files and a vise as you get the hang of it.
Avoid Common Mistakes
- Snagging a Full Professional Set: No need for a ton of tools upfront—they just clutter things up and cost more.
- Skimping on Quality: Shoddy tools can slip, scratch, or warp, leading to gem damage you can’t fix.
Tool Maintenance and Care Tips
Looking after your tools matters as much as picking them. Good habits keep them working well and lasting longer.
- Clean them after every session: A quick wipe with a soft cloth gets rid of dust, shavings, or residue.
- Store smart: Tuck sharp tools into cases or separate spots to protect them.
- Ward off rust: Keep files, hammers, and pushers dry, and maybe add a touch of oil if they’re prone to it.
- Spot wear early: Check handles and grips often; fix or replace anything that’s wearing down for safety and accuracy.
The Advanced Path
Once your skills start clicking, you’ll likely want to level up your setup.
- Upgraded Hand Tools: Go for ergonomic pushers, precision hammers, and better files.
- Additional Accessories: Things like burnishers, ring clamps, and specialty vises come in handy.
- Power Tools: A jewelry micromotor or polisher can boost your speed, precision, and output—especially if you’re turning pro or running a small operation.
Want more on what pros use? Check our guide: What Do Jewelers Use to Set Diamonds?
Conclusion
You don’t need a fancy or overloaded toolkit to start gem setting. Stick to the essentials, and you’ll pick up skills quicker, dodge expensive slip-ups, and build real confidence. Bottom line: The right starter set is your launchpad for success.
Ready to jump in? Take a look at our beginner-friendly starter kits and jewelry tools for both newbies and pros.