

You’ve sanded for hours, but the finish is still hazy. Frustrating, isn’t it? A true mirror finish isn’t about pressing harder—it’s about the precise art of microscopic leveling. Stop guessing with your compounds; here is exactly how to turn that dull grey into a flawless reflection.
I. Speed and Heat Control
Success in polishing depends not on the motor’s raw power, but on the Surface Feet Per Minute (SFPM) at the edge of the buffing wheel.
- Calculation Formula: SFPM = 1/4 × Wheel Diameter × RPM.
- Professional Standard: For optimal results, the surface speed should be maintained between 3,600 and 7,500 SFPM.
- Hardware Matching: When using an 8-inch wheel, the motor should provide at least 1/2 HP to prevent the wheel from collapsing or the speed from dropping under the high load of the cutting stage.
- Heat Control: High-speed rotation generates intense friction heat. When working on thin metal panels or heat-sensitive materials (like plastics), one must reduce the speed or use Airway Buffs—which feature a pleated design to improve airflow—to prevent the workpiece from warping or discoloring.
II. Choosing Your Materials: The Compound Color Chart
Polishing compounds are scaled similarly to sandpaper, ranging from aggressive “cut” bars to super-fine “color” rouges.
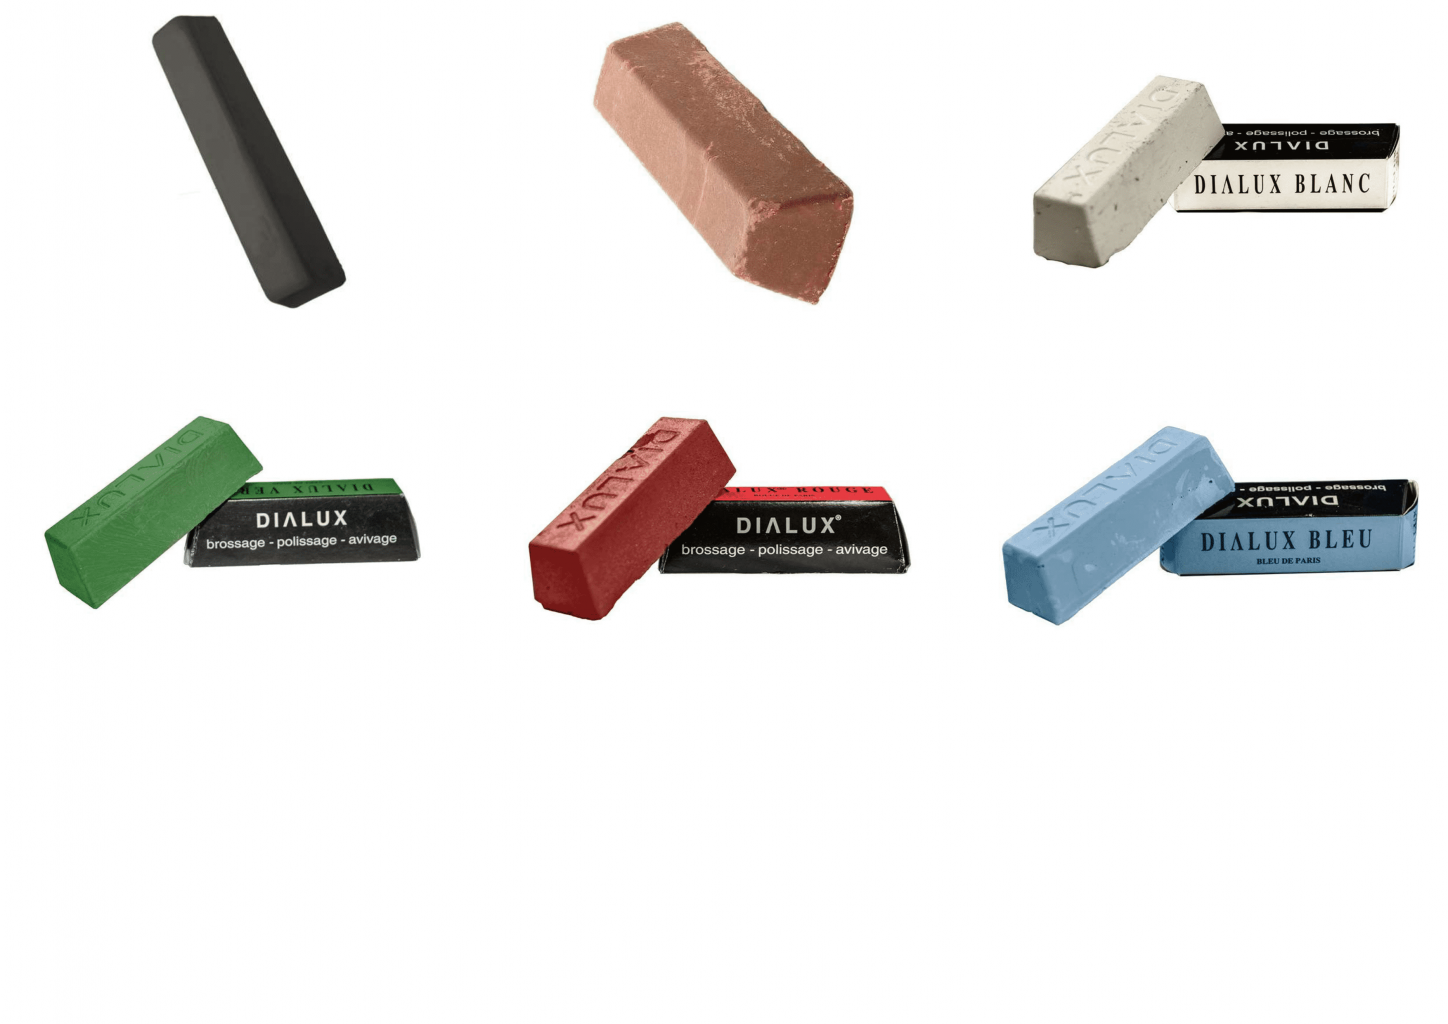
| Color | Name | Application |
| Black | Emery | Aggressive cutting; removes rust, scale, and deep scratches. |
| Brown | Tripoli | Intermediate stage for soft metals (Aluminum, Brass, Copper). |
| White | White Rouge | Finer cutting/polishing for harder metals and Stainless Steel. |
| Green | Green Rouge | Specifically for the final, mirror-like finishing of Stainless Steel. |
| Red/Blue | Jeweler’s Rouge | High-luster finish for precious metals; Blue is great for plastics. |
III. Essential Equipment: Choosing the Right Wheel
Selecting the correct wheel (or “buff”) is as critical as the compound itself:
- Sisal Wheels: Made of stiff fibers, these are ideal for aggressive cutting and removing heavy oxidation during the “cut buffing” stage.
- Spiral Sewn Cotton: Firm and tightly stitched, these provide the pressure needed for general-purpose cutting and smoothing surface marks.
- Loose or Flannel Wheels: Soft and flexible, these “mush” into detailed crevices and are used for final color buffing to achieve a mirror shine.
- Airway Buffs: Feature a pleated design that improves airflow to reduce heat buildup, preventing the metal from warping or discoloring.
IV. The Professional Buffing Process
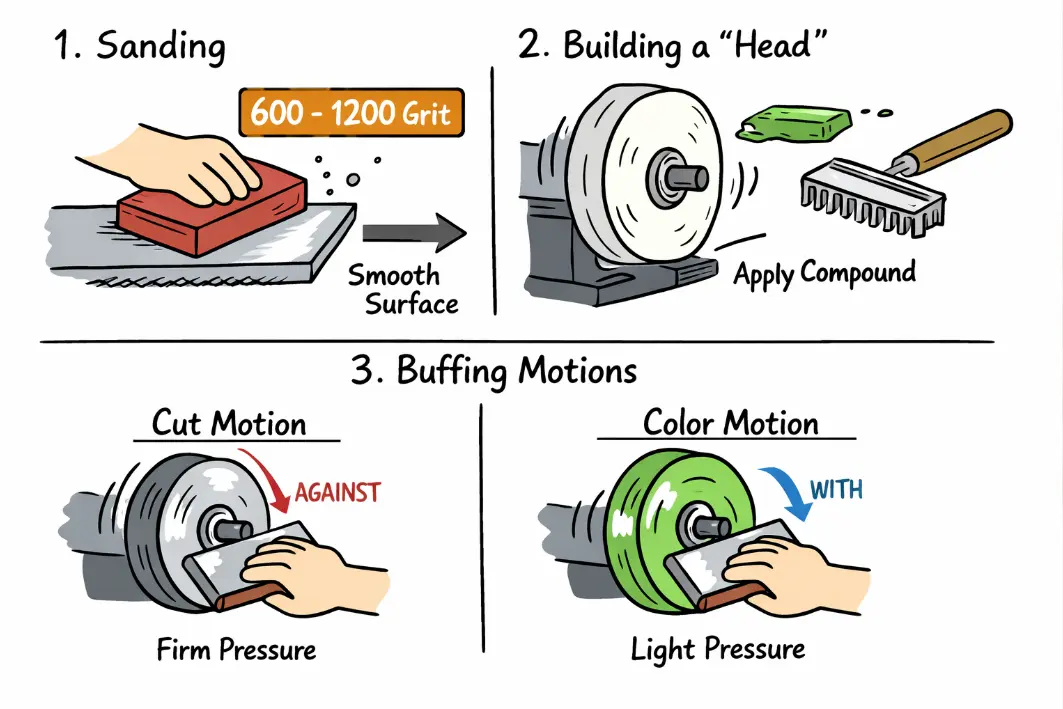
- Pre-treatment: If the surface has deep scratches, mechanical sanding is required first. One should sand with progressively finer grits, typically starting at 40 and reaching at least 600 grit. For a true professional-level mirror finish, it is highly recommended to continue manual fine-sanding up to 1200 grit or higher before beginning the buffing process.
- Building a “Head”: New wheels must be pre-heated and loaded repeatedly with compound to build a “head”. If an old wheel develops a greasy “black slick,” it indicates over-application or expired abrasive; a wheel rake must be used to clear the hardened residue and reveal clean fibers.
- Two Fundamental Motions:
- Cut Motion: Move the workpiece against the direction of the wheel’s rotation using medium to hard pressure to produce a uniform, semi-bright surface.
- Color Motion: Move the workpiece with the direction of the wheel’s rotation using light pressure to allow the friction heat to distribute the wax evenly, creating high-gloss luster.
V. Maintenance and Pro-Tips
- Avoid Cross-Contamination: You must use a separate wheel for each compound to prevent coarse abrasives from ruining a fine finish.
- Raking the Wheel: Periodically use a wheel rake to remove metal particles and hardened compound, keeping the wheel “bright and fluffy”.
- Heat Control: Keep the workpiece moving and use light pressure; excessive heat can warp thin metal panels or cause “burn marks”.
- Cleaning Residue: Remove waxy residue after buffing with a microfiber cloth; “swirl marks” can be eliminated by dusting with talcum powder or corn starch and rebuffing.
VI. How Can I Tell if My Buffing Wheel is Contaminated?
Even with careful maintenance, contamination can ruin a finish. Watch for these signs:
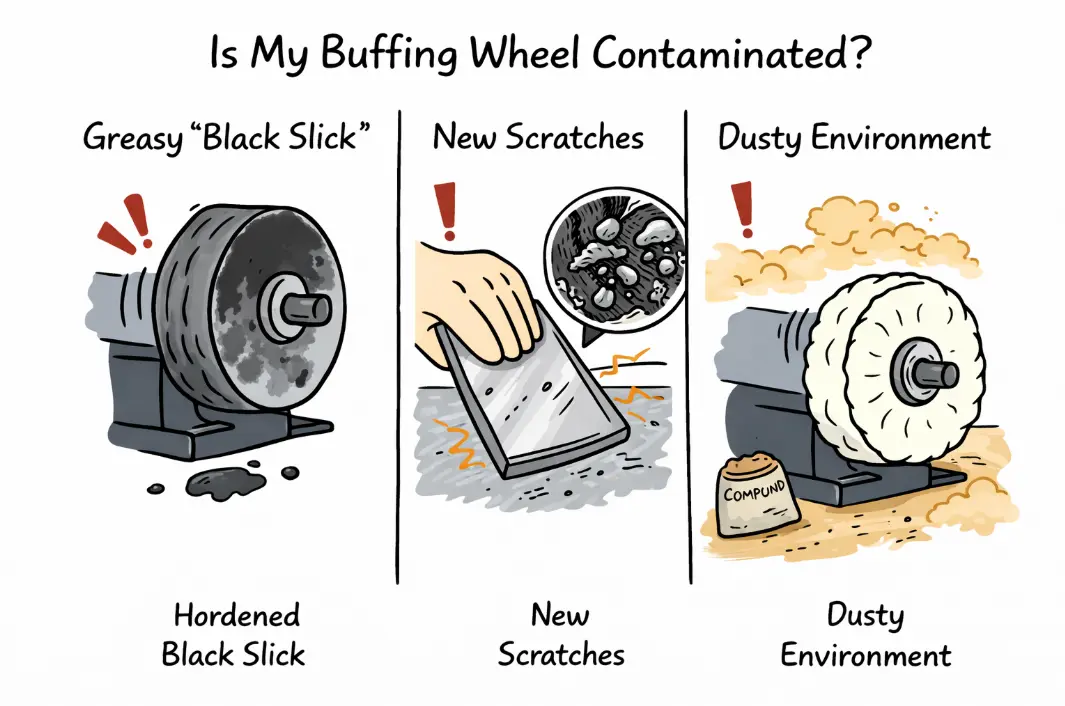
- Visual Indicators: Hardened compound build-up (instead of fluffy fibers) or a greasy “Black Slick” on the wheel face.
- Surface Performance: A soft wheel suddenly creating new scratches or uneven streaks. This usually means metal shards or coarse grit are trapped in the fibers.
- Operational Errors: If you’ve used one wheel for different compounds or work in a dusty area, your wheel is likely compromised.
VII. Safety First
Buffing machines can be dangerous and require strict safety protocols:
- PPE: Always wear safety goggles, an apron, gloves, and a dust mask.
- The Safe Zone: Never apply the workpiece to the “Unsafe Area” rotating towards you, as it can catch edges and throw the object at high speed.
- Personal Safety: Remove all jewelry (rings and watches) and avoid loose clothing that could catch in the rotating spindle.
Conclusion
Professional metal buffing provides a durable finish, but it is not permanent. To protect the glow and prevent future oxidation or tarnish, clean the metal regularly and apply a protective coating, such as a sealant or wax.
Ready to put this theory into practice? The quality of your shine depends heavily on the quality of your abrasive. Visit JYBS to explore our premium range of Metal Polishing Compounds and find the perfect match for your next project.